I not long ago painted my own inner headlight housings dark (sometimes referred to as the “Joey mod”) and desired to share a few quick pictures as well as a DIY of earn money did that mod. I decided to accomplish this after seeing my mate Blake’s RS4 with blacked out and about headlights along with really taste how the item looked upon his car. Given there is certainly very tiny chrome still left on my own car, I also felt the particular chrome headlights were needs to stick out an excessive amount of and portray the headlights dark might connect everything collectively nicely. Overall I’m happy with the item (despite a few initial reservations) along with think its the best way to make the top end somewhat more ambitious than it could be otherwise…
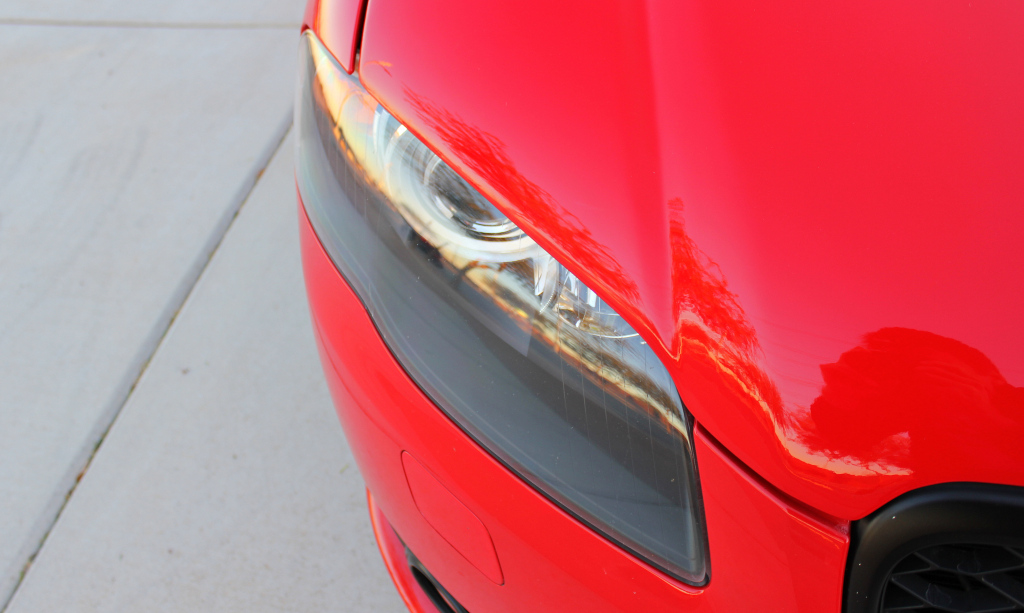
2013-01-04 17. 38. 43Above you can view the just before and right after – My partner and i wasn’t thus sure plainly liked it in the beginning as the item looked a little too aftermarket (dare My partner and i say ricey? ), but given that I’ve trained with some time, I truly dig the item. In order to produce it look a tad bit more OEM, I added back my red turn indication reflectors, which I believe helped maintain your look aggressive without having to be extraordinary. In the particular picture over, I think you can view what After all about the particular headlights sticking out too very much when inside the original chrome/silver end, whereas below they blend in a tiny nicer using the red & bright motif which i have throughout the car…
IMG_5146The neat thing about that mod is actually that it’s quite simple to do, costs almost nothing (the cost of merely one can connected with spray paint as well as a small T8 torx screwdriver) along with makes a massive difference towards appearance in the car. On top of that, if/when My partner and i get sick and tired of it, it should be pretty all to easy to reverse by removing the interior housing out and about and portray it metallic again. I might also experiment which has a gunmetal color to find out how that looks further later on.
IMG_1409To do that mod, take off the headlights just like you would with the clear spot mod detailed in this posting – in reality, I’d recommend doing just about all mods in your headlights right now – which includes LED DRLs, clear corner mod, new headlight lights, and any changes towards bulbs or perhaps front-end appearance mods in store. Pull the particular headlights separated by removing the 5 retaining clips along with heating the particular glue (again, as described inside the clear spot post above). Once the headlight is actually split inside two, you can find three screws holding inside the inner real estate pictured over – there’re very smaller torx bits size 8, and you may need to pick up a special screwdriver to acquire them because so many standard torx bits is going to be too big. A T8 torx screwdriver need to be available on any do-it-yourself store (Home Depot, Expert, Lowes, for example. ). Once the inner housing have been removed, give the item a mild sanding and then paint it the colour you need. Give it a number of coats and let the item dry just before screwing it back and and then reinstall anything. Also be certain not to acquire any fingerprints on the medial side the headlight real estate, because if you do it will drive an individual nuts (ask me earn money know! ). Give the medial side a quick wipe down which has a microfiber to be certain there is no dust or perhaps fingerprints that could be distracting as soon as you put the particular headlights rear together…
IMG_1411
The different thing you really should consider doing at this point is any headlight restoration in case your headlights tend to be badly pitted or discolored on the outside of. When the particular headlights are off the car, it’s less of a challenge to sand and powerful them with out worrying in relation to scratching the particular paint (plus you can apply it from the comfort connected with indoors). If you choose to do any headlight restoration kit, I like this one by Meguiars the way it comes with sandpaper to really get out and about the pitting along with imperfections you might have accumulated (the packages with only polish don’t truly clean deep enough, IMO).
IMG_5140
The only hard portion is taking off the bumper along with headlights, although it’s pretty straightforward in the event you’ve done that portion before. Should you haven’t, you can even just do one side at the same time (without getting the bumper every one of the way down, just 50 % off) to help you keep everything set up nicely. If you take the bumper every one of the way down, only make tighter the headlights rear on about 50 % of way just before putting the particular bumper rear on, then make tighter and change the headlights last to be certain everything collections up perfectly, otherwise you’ll get some some unattractive gaps between headlights, grille along with bottom in the hoo.